Check this out!
My family loves green beans so I often serve them as a side dish with dinner. As a mom  with two kiddos I know I must keep it interesting, and tasty, if I want to keep this green vegetable a family favorite! So what do I do…I add bacon!!! As I always say, “Everything is better with bacon!”
Doing the Math: It is up to you how many jars of home canned green beans you’d like to see lining your pantry shelves. I like to can both pints and quarts so I have the right amount handy depending on who’s coming to dinner. Based on personal experience, I’ve done some of the math for you and listed a guideline below. Keep in mind – the size and weight of the type of bean you use will ultimately determine how much you will need.
50 pounds of cut beans will produce approximately 45 quarts
10 pounds of cut beans will produce approximately 9 quarts or 18 pints
2 pounds of cut beans will produce approximately 1 quart or 2 pints
Bean Prep: Using a colander, wash the beans under cold running water. Disregard any ill-looking and rusty beans. Remove stems and leave the end tip. Cut beans in bite size pieces approximately 2” in length.
Bacon Prep: If you plan to make at least 9 quarts of home canned green beans, then plan on using about 1 pound of bacon. A great deal depends on the type and cut of the bacon you are using so be sure to have extra on hand just in case. And feel free to get creative! I once made a batch using peppered bacon and it was DELICIOUS!
In a large skillet, fry up your bacon slices until crispy but not burnt. Cool bacon in paper towel so excess grease is soaked up – the goal is getting the bacon flavor not the fat! When bacon has cooled, crumble into small pieces and set aside in a clean bowl. If you are in a pinch or prefer using bacon crumbles in your meals, feel free to substitute store bought bacon crumbles for pan fried bacon. I do not recommend or use Bacon Bits – anything with that many chemicals doesn’t belong in home canned goods!
If you are on a low sodium diet, by all means, do not add bacon or salt – the green beans are just as tasty all on their own! 🙂
Jar prep: Prior filling the jar with green beans the clean, empty jars need to be prepped. For each quart-sized jar, add 1 tablespoon of bacon bits and 1 teaspoon salt (optional). For each pint-sized jar, use a ½ tablespoon of bacon bits and ½ teaspoon of salt (optional).
Now, I don’t know about you, but I do not like eating mushy green beans with my meal. For that reason, I use the raw pack method when home canning green beans. Pack each jar tightly w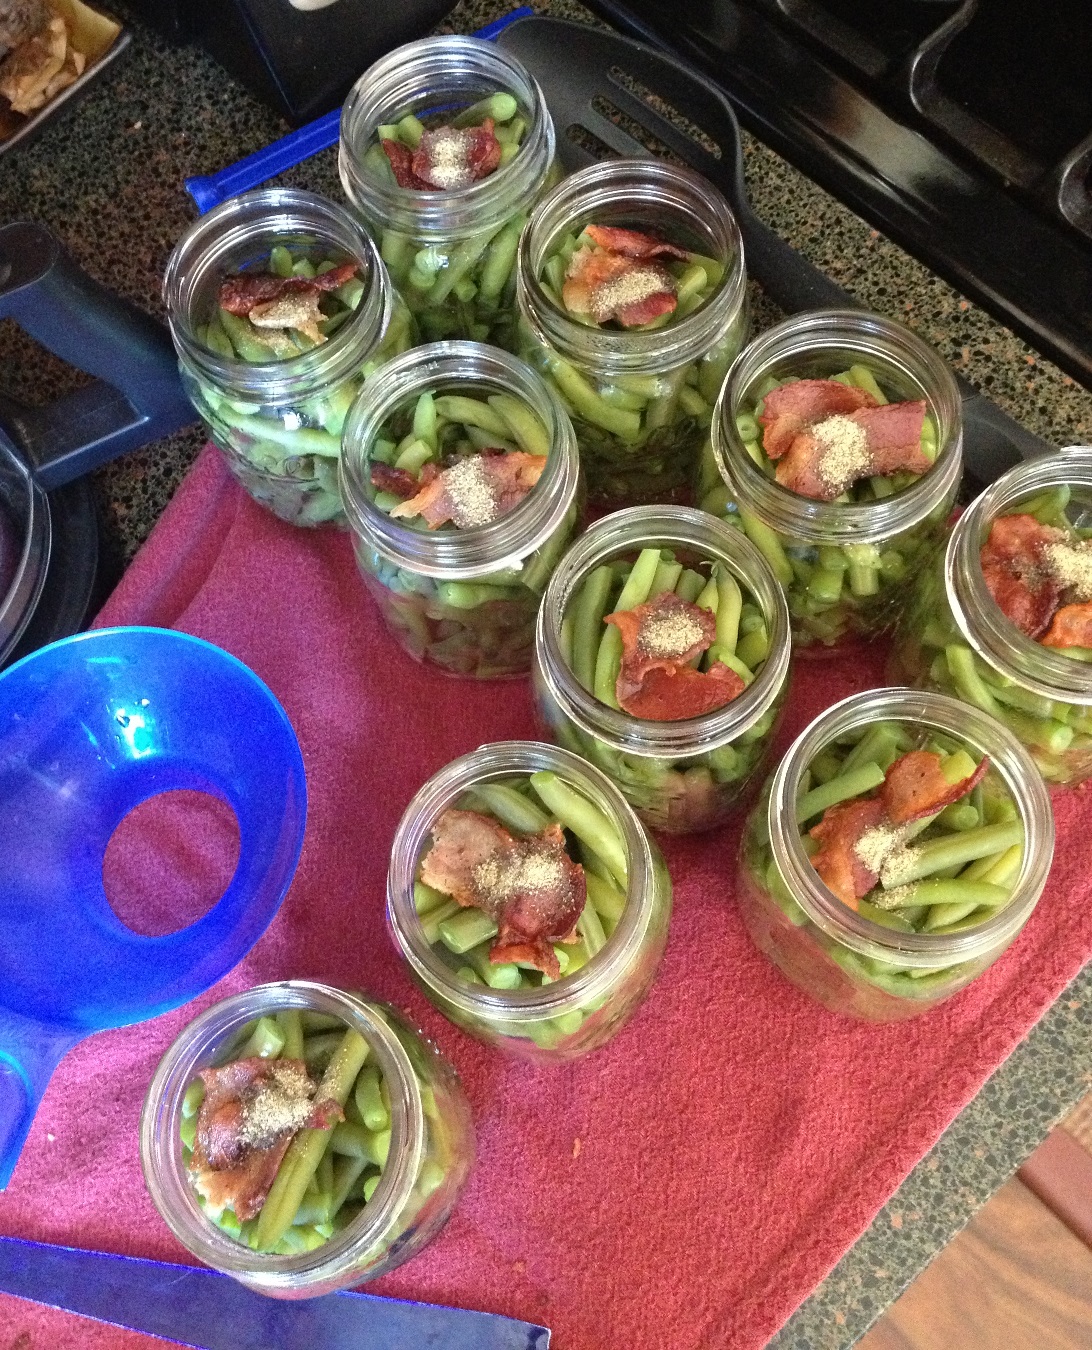 ith as many raw green beans as the jar will hold – being sure to leave a ½ inch head space. I use the end of my wooden spoon to tamp down the beans. This allows me to pack as many as I can inside the jar. Reason we pack them tight: When the jars are processed, the green beans will shrink up some so you want to have the jar packed full so you don’t wind up with more water than beans.
Because we raw packed cold beans you may cover the beans using cool/room temp water. I use purified water because we have well water with a water softener… When adding water be sure to keep the ½ inch headspace.
Wipe each rim with a clean washcloth, add lids and hand tighten the rings. Place jars in pressure canner and process at 10 pounds of pressure; process quarts for 25 minutes and pints for 20 minutes.
Green beans with bacon make a yummy side dish not to mention a great starter for green bean casserole this Thanksgiving!
Enjoy~
The Canning Diva