Check this out!
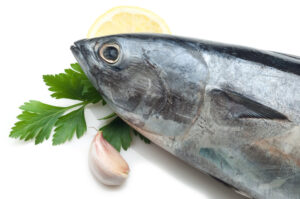
Fresh- and saltwater fish can be safely preserved by pressure canning, but the processing time is much longer than the standard processing time for meat. Freshwater fish like catfish, northern pike, salmon, smelt and trout are perfect candidates for canning; whereas panfish like perch, bass and walleye are better suited for freezing or eating fresh. Tuna requires more attention when canning, and shrimp can easily be preserved using brine.
Let’s explore pressure canning fish, with the exception of tuna. Canning Tuna is explained in a separate recipe post.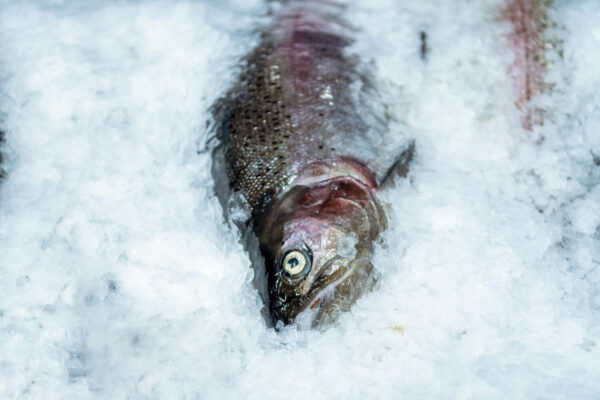
Preparing Fish for Canning
Freshly caught fish is very perishable and requires special handling. Freshly caught fish must be kept cold and gutted by removing internal organs soon after they are caught, or within 24 hours. Keep cleaned fish on ice or in the refrigerator below 40 degrees Fahrenheit until ready to use. Be sure to pressure can the gutted and cleaned fish within 2 days of being caught. It is safe to pressure can fish that have been frozen, just be sure to fully thaw the fish in the refrigerator prior to packing into jars.
It is best to pressure can fish in wide-mouthed pints and half-pint jars. The wide mouth of the jar makes it easier to pack the fresh fish and remove it when ready to eat.
For larger fish, remove the bones and fat from skinned fillets and cut fillets into 2- or 3-inch pieces. Smaller fish, like smelt, are canned whole with their heads and tails removed.
Yield Prep Tip: You need roughly one (1) pound of fish to fill one (1) wide-mouthed pint jar.
Instructions
- Bleed and eviscerate fish immediately after catching. This must be done within 2 hours after they have been caught. Chill the cleaned fish immediately and keep on ice until you are ready to can. If this fish is frozen, thaw it completely in the refrigerator before canning.
- Remove the head, tail and fins. Was the fish carefully in cold water. Split the fish lengthwise and cut into lengths suitable for the size jar you are using. Bones and skin can be removed or left in, with the exception of halibut, which MUST HAVE the bones and skin removed prior to canning. We do this because the skin of Halibut is too tough to consume; Halibut bones are excellent for making fish stock.
- Cut filleted fish into 2- or 3-inch pieces depending on whether you are packing into half-pint or pint jars. Pack the fish tightly into each jar, leaving a 1-inch headspace. If desired, you may add salt for flavor. If so, you may add 1 teaspoon to each pint and a 1/2 teaspoon to each half-pint. Do NOT cover the fish in water.
- Wipe the jar rim of each jar with a warm wet washcloth dipped in vinegar. Place a lid and ring on each jar and hand tighten.
- Add cool water in your pressure canner per the manufacturer requirements, often 3 quarts. Place cool jars in the pressure canner, lock the pressure canner lid, and place canner on high medium-high heat for 15 minutes. Increase heat to high after 15 minutes to allow the canner to get hot enough to vent.
- Let the canner vent for 10 minutes. Close the vent and continue heating to achieve 11 PSI for a dial gauge and 10 PSI for a weighted gauge, or according to your elevation. Process both pints and half-pints for 100 minutes (1 hour and 40 minutes).
- When timer goes off and processing is done, turn off heat and allow the pressure in the canner to naturally get back to zero. This could take upwards of 45 minutes or more. Once canner is at zero PSI, remove canner lid, being sure deflect the steam from your face. Allow canner to sit for 10 minutes undisturbed prior to removing jars from the canner.
- Place jars on a cutting board and allow to cool undisturbed for a minimum of 8 hours or overnight. Once all the lids have sealed, and jars have fully cooled, remove the rings and wash jars in warm soapy water. Store rings to reuse, then label each jar with name and date then store.
New to using a pressure canner? Not to worry! Learn more about how to safely pressure can in your home kitchen, and check out the Top 10 Rules of Pressure Canning. You will be a professional in no time!
Happy Canning!
xx,
Diane, The Canning Diva~