
Check this out!
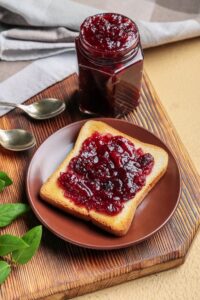
Homemade Elderberry Syrup: Canning Recipe for Immune Support
(This article may contain affiliate links. I make a small profit if you purchase which helps me cover the costs of maintaining my website. Thank you for your continued support.)
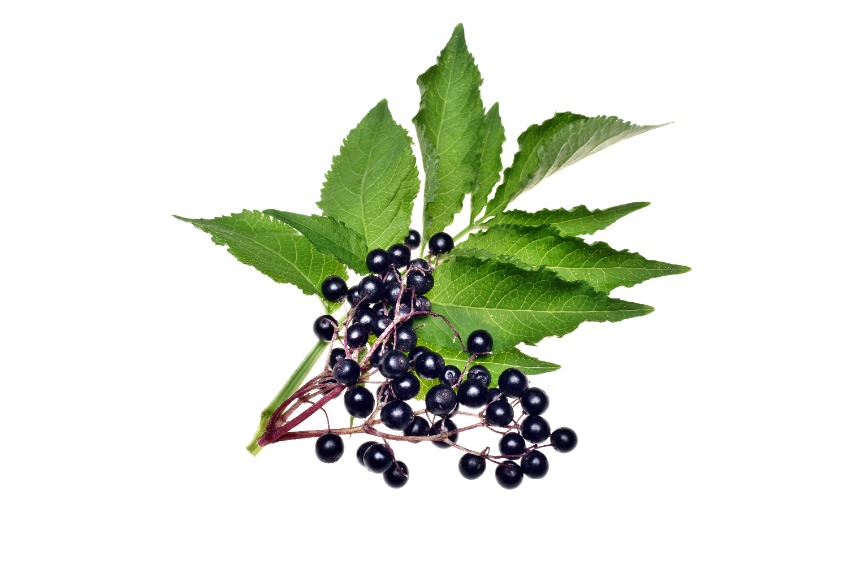
Elderberry is used to make wine, jam, and syrup and some people also use elderberry to make pie filling. It has also been known to help medicinally by supporting the immune system and having antiviral and anti-inflammatory benefits – specifically the Sambucus Nigra variety.
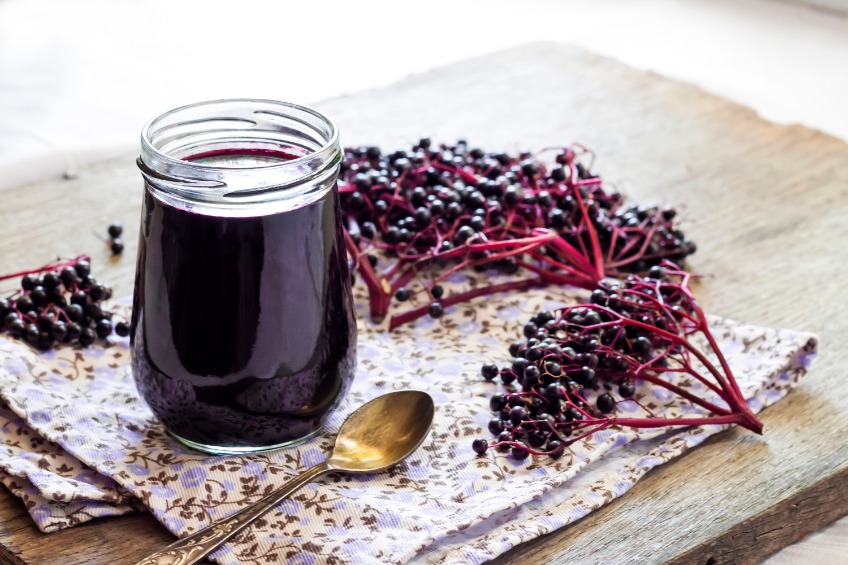
I love canning elderberries each year in a variety of ways so we may enjoy their healthy benefits and amazing flavors all year ’round. Specifically, my Elderberry Syrup canning recipe is a scrumptious version embodying cinnamon and cloves and natural, raw unbleached sugar.
EverydayHealth.com described in detail the many benefits of ingesting elderberry. In modern times, elderberries played a key role in healing before the advent of antibiotics. All the parts of the plant were believed to be medicinal, including its leaves and bark, and were used to treat pain, as an anti-inflammatory, for toothaches, fevers, and other ailments.
Elderberries are rich in flavonoids like anthocyanins, a powerful plant pigments that reduce inflammation and have antiviral properties. However, elderberries MUST BE COOKED prior to eating or they can make you very sick. The bark, leaves, seeds, and unripe fruit may cause cyanide poisoning when ingested if they’re not prepared. Only eat blue and purple elderberries when they’re ripe and after they are cooked. Side effects of uncooked berries include nausea or vomiting. Lastly, NEVER eat red berries on other elderberry plant species because they are toxic!
Because of the seasonal nature and availability of the elderberry, I will often purchase dried organic elderberries and keep them in airtight containers until I am ready to use them. You may also freeze your freshly picked elderberries prior to cooking and using in a recipe.
I will add, when using dried elderberries, they will have sticks and twigs mixed with the berries so be sure not to use dried berries if you plan on using the whole berry. Fresh elderberries are better for making jams and pie fillings.
Because there are so many varieties of elderberries, their pH value ranges too. An elderberry is less acidic than traditional berries with a range from 4.70 to 5.20, similar to that of tomatoes. It is for this reason we increase the processing time when water bathing to make this syrup shelf stable. While there are many tasty uses, I primarily reserve a jar or two in my pantry specifically for medicinal purposes giving its antiviral and anti-inflammatory benefits.
Elderberry Syrup Canning Recipe
Makes about 7 half-pints or 3 pints
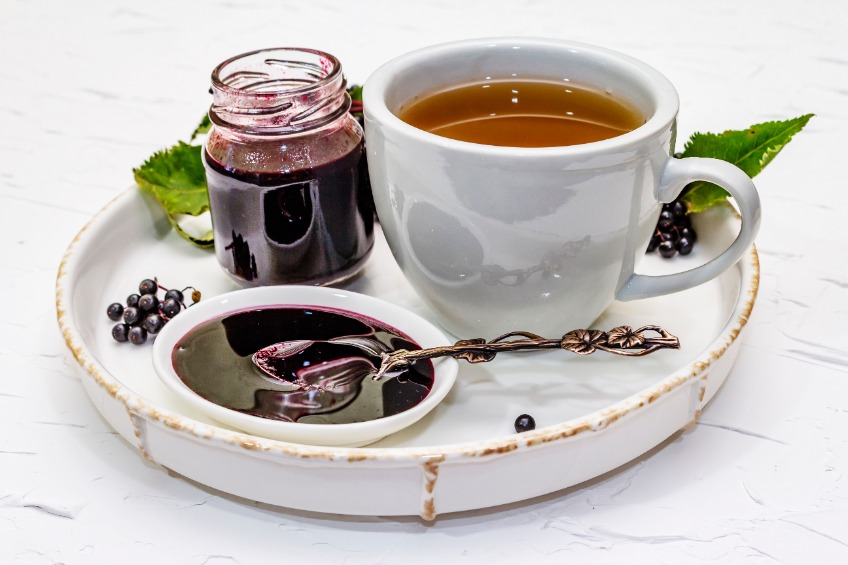
A flavorful and potent syrup often used in a cup of piping hot green tea to help ward off a cold or flu bug. Whether you make my Elderberry Tonic to use for medicinal purposes, or use this delicious syrup overtop of ice cream or drizzled atop any breakfast pastry, pancake, or waffle, delight in its many benefits and amazing flavor.
Ingredients
- ½ pound dried elderberry (2 cups)/1 pound fresh elderberry (4 cups)
- 8 cups water
- 1-3 tablespoons gingerroot, minced
- 4 cups granulated sugar (preferably raw, unbleached)
- 2 teaspoons ground cinnamon
- 1 teaspoon ground cloves
Instructions
- If using fresh elderberries, be sure to rinse the berries well in a colander in the sink. Remove the berries from the stem by running each stem through the tines of a fork.
- Place the elderberries and minced gingerroot in a stockpot and add water. On medium-high heat, bring to a boil, stirring often. Once at a boil, reduce heat to low, cover and simmer for 30 minutes. Stirring often to avoid scorching. (If using dried elderberries, simmer covered for 1 hour, stirring often.)
- Remove from heat, uncover and allow to cool to the touch, about 20 minutes, so you do not burn yourself when handling.
- Using a sieve or a measuring bowl covered with cheesecloth, slowly strain the elderberry ginger mixture capturing all the liquid. Feel free to allow to drain for several hours to increase the syrups concentration, otherwise allow the berries to drain for one hour. If using a sieve, mash mixture into the sieve to expel more liquid. Discard berry-ginger mixture but retain the liquid.
- Add the captured elderberry liquid to a clean stockpot. Next add the sugar, cinnamon, and cloves and mix well. On medium heat, bring mixture to a boil stirring often. Reduce heat to low and simmer for 30 minutes, stirring frequently to avoid scorching.
- Ladle the hot elderberry syrup into hot jars leaving a ½-inch of headspace.
- Wipe each jar rim with a washcloth dipped in vinegar. Place a lid and ring on each jar and hand tighten.
- Place jars in a water bather, submerge in water being sure each jar is covered by 2-inches of water. Process both half-pints and pints for 40 minutes. Do not start your timer until the water is at a full rolling boil. After processing, allow jars to rest in the canner for 5 minutes with the lid off before removing jars to cool.
I sure hope you enjoy creating and canning this amazing berry! Having it on your pantry shelf is such a blessing. Be sure to follow me on Facebook and if you are new to canning, be sure to pick up a copy of my cookbook, Beginner’s Guide to Canning so you may learn how to safely water bath and pressure can food in jars for years to come.
Happy Canning!
xo
Diane, The Canning Diva®
www.canningdiva.com
Homemade Elderberry Syrup: Canning Recipe for Immune Support
A flavorful and potent syrup often used in a cup of piping hot green tea to help ward off a cold or flu bug. Whether you make my Elderberry Tonic to use for medicinal purposes, or use this delicious syrup overtop of ice cream or drizzled atop any breakfast pastry, pancake, or waffle, delight in its many benefits and amazing flavor.
Servings
3 pints or 7 half-pints
servingsPrep time
30
minutesIngredients
1/2 pound 1/2 dried elderberries (2 cups) or 1 pound fresh elderberries (4 cups)
8 cups 8 water
1 1 -3tablespoons gingerroot, minced
4 cups 4 granulated sugar (preferably raw, unbleached)
2 teaspoons 2 ground cinnamon
1 teaspoon 1 ground cloves
Instructions
- If using fresh elderberries, be sure to rinse the berries well in a colander in the sink. Remove the berries from the stem by running each stem through the tines of a fork.
- Place the elderberries and minced gingerroot in a stockpot and add water. On medium-high heat, bring to a boil, stirring often. Once at a boil, reduce heat to low, cover and simmer for 30 minutes. Stirring often to avoid scorching. (If using dried elderberries, simmer covered for 1 hour, stirring often.)
- Remove from heat, uncover and allow to cool to the touch, about 20 minutes, so you do not burn yourself when handling.
- Using a sieve or a measuring bowl covered with cheesecloth, slowly strain the elderberry ginger mixture capturing all the liquid. Feel free to allow to drain for several hours to increase the syrups concentration, otherwise allow the berries to drain for one hour. If using a sieve, mash mixture into the sieve to expel more liquid. Discard berry-ginger mixture but retain the liquid.
- Add the captured elderberry liquid to a clean stockpot. Next add the sugar, cinnamon, and cloves and mix well. On medium heat, bring mixture to a boil stirring often. Reduce heat to low and simmer for 30 minutes, stirring frequently to avoid scorching.
- Ladle the hot elderberry syrup into hot jars leaving a ½-inch of headspace.
- Wipe each jar rim with a washcloth dipped in vinegar. Place a lid and ring on each jar and hand tighten.
- Place jars in a water bather, submerge in water being sure each jar is covered by 2-inches of water. Process both half-pints and pints for 40 minutes. Do not start your timer until the water is at a full rolling boil. After processing, allow jars to rest in the canner for 5 minutes with the lid off before removing jars to cool.
Did you make this recipe?
Tag @canningdiva on Instagram and hashtag it with #thecanningdiva
Like this recipe?
Follow @canningdiva on Pinterest