Check this out!
Chili Con Carne Canning Recipe
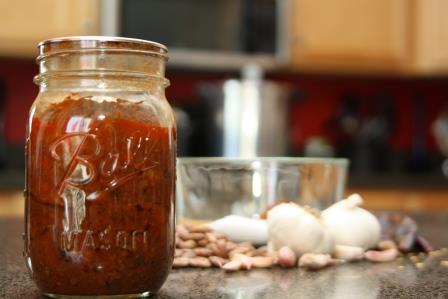
One of my favorite Meals in a Jar is my home canned Chili with meat and beans! Especially when the snow starts to fly in Michigan – nothing beats heating up a quart of chili to warm me from the inside out! 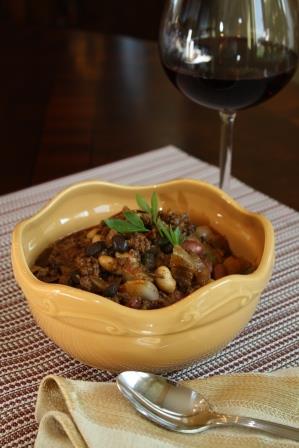
Diane’s Homemade Chili Con Carne Canning Recipe
makes approx. 9 quarts or 18 pints
This recipe is delicious served in a bowl with a side of beer bread, or inside a bread bowl! You may also use it when making a chili omelet – which I suggest canning in pint size jars which are a perfect size for this hearty breakfast! Whatever the use, be sure to make plenty to line your pantry shelves. You’ll be happy you did!
- 5 pounds of hamburger
- 2 pounds Italian sausage
- 2 bell pepper, finely chopped (any color)
- 1 large onion finely chopped onions
- 4 large stalks parsley, finely chopped
- 1 jalapenos, deseeded and finely chopped (keep seeds if you want more HEAT in your chili)
- 5 garlic cloves, minced
- 1 cup chili powder, divided
- 1 tsp cumin seeds
- 12 cups diced Roma tomatoes, approximately 24-36 Romas
- ½ lb of rehydrated black beans
- ½ lb of rehydrated kidney beans
- ¼ lb rehydrated pinto beans
- If you prefer to use store bought canned beans, it would equal 2
cans of black, 2 cans of kidney and 1 can of pinto beans. - ¼ cup cumin power
- 1-2 tsp red pepper flakes
- 6-8 drops Tabasco sauce
- 4 tsp course canning salt, optional
- Black pepper to taste
Bean Prep:
As with any dried beans, be sure to sort out any disfigured or damaged beans as well as any rocks that may have made it into the bag. Rinse the beans in a large colander to remove any dirt. Quick soak your dried beans using the following method: Place dried beans in a large stock pot and cover beans entirely with water. Bring to a boil. Boil for 2 minutes, then remove from heat. Cover and let soak for 1 hour.
Vegetable Prep:
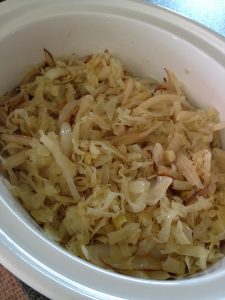
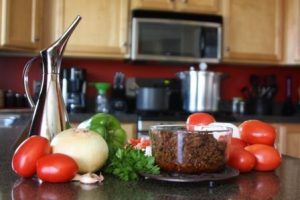
My family does not like large chunks of vegetables in their chili or spaghetti sauce, so I place my vegetables in a food processor and pulse until they are finely finely chopped, not pureed. Pureed would water down the chili too much. If you like your chili chunky, by all means, chop the vegetables to your size preference – doing your best to keep them uniform in size – and feel free to mash your tomatoes with a potato masher. I pulse my tomatoes first, measure, then set aside. I then pulse the onions, peppers, garlic and parsley together seeing they are added to the chili at the same time.
Instructions
- Brown hamburger and sausage in a large stainless steel stock pot. I use lean meat so I rarely have much excess grease, however, whether you drain the fat or blot up excess with a paper towel, be sure to remove excess fat from the meat.
- Add bell peppers, onions, parsley, jalapeno, minced garlic, ½ cup chili powder and 1 tsp cumin seeds to the cooked meat mixture. Stir everything together well so the chili flavor can permeate the meat. Cook on medium-heat until onions are translucent and tender, about 8 minutes.
- Add tomatoes, beans, cumin powder, red pepper flakes, Tabasco sauce, salt and pepper and remaining 1/2 cup chili powder to the stock pot and mix well. Bring contents to a boil stirring often to avoid scorching. Reduce heat and boil gently for 15 minutes, stirring often. I use this gentle boiling period to reduce the water content to avoid my chili being too runny.
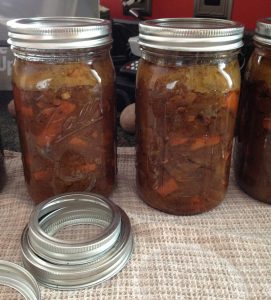
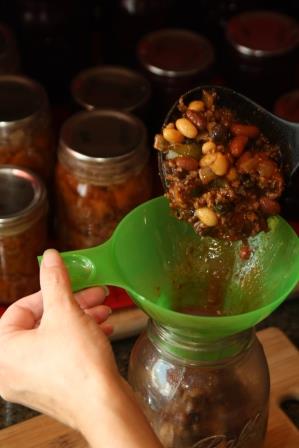
- Ladle chili into hot jars being sure to leave a generous 1-inch headspace. I have found that leaving just under an inch of headspace helps the lid seal better giving the grease content of the meat. Remove any air pockets using your headspace measuring tool and add additional chili if necessary, being sure to keep the 1-1/4 inch of headspace.
- Wipe the jar rims with warm wash clothed dipped in vinegar (the vinegar cuts through the grease aiding in a better lid seal). Place prepared lids and rings on each quart and hand tighten.
 Pressure can 10 pounds of pressure, or according to your elevation, quarts for 90 minutes and pints for 75 minutes.
RECIPE TIP:
I do a great deal of taste-testing as well as aroma smelling to ensure my food has the right flavor I know my family will love. Keep in mind, you can always add more seasonings later, but you cannot remove them. So sometimes less is more…
Enjoy~
Diane, The Canning Diva®
www.canningdiva.com
Photos Courtesy of McCloud Photography