Check this out!

Canning Chicken and Poultry
Home-canned chicken and poultry is the perfect starter for so many quick, healthy recipes you’ll wonder why you didn’t think of this sooner. Simply heat and add seasonings to create meals like chicken curry soup, tacos, enchiladas and chicken Alfredo. Home-canned chicken is even great to take camping. The protein-packed possibilities are endless!
PREPARING POULTRY FOR CANNING
Use the following tips when home canning chicken, turkey or any poultry or water fowl:
![]() Remove excess fat and skin from breasts and thighs.
Remove excess fat and skin from breasts and thighs.
![]() Keep the bones in legs and thighs, if preferred.
Keep the bones in legs and thighs, if preferred.
![]() Adding cool water when raw packing or hot broth when hot packing is a personal preference.
Adding cool water when raw packing or hot broth when hot packing is a personal preference.
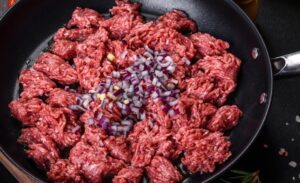
![]() Precook ground poultry and drain any excess liquid or fat. Ground poultry can be canned loose, in patties, or in links. Do NOT add water to the jar when canning ground meat!
Precook ground poultry and drain any excess liquid or fat. Ground poultry can be canned loose, in patties, or in links. Do NOT add water to the jar when canning ground meat!
![]() Always give each jar 1¼ inches (also referenced as “a generous inch” in recipes) of headspace when filling. This allows ample room in the jar to avoid any fat/oil from getting onto the jar rim during processing and cooling.
Always give each jar 1¼ inches (also referenced as “a generous inch” in recipes) of headspace when filling. This allows ample room in the jar to avoid any fat/oil from getting onto the jar rim during processing and cooling.
![]() Always wipe the jar rim and rings with a warm wet washcloth dipped in distilled white vinegar. This will cut through grease/oil residue and help ensure a good lid seal.
Always wipe the jar rim and rings with a warm wet washcloth dipped in distilled white vinegar. This will cut through grease/oil residue and help ensure a good lid seal.
![]() If you raise chickens, be sure to chill dressed poultry for 6 to 12 hours before canning.
If you raise chickens, be sure to chill dressed poultry for 6 to 12 hours before canning.
Let’s dive deeper regarding adding water or broth to home canned chicken or poultry…
- Poultry without the addition of water will make its own broth in the jar while it cooks during processing; however, at times, it may not produce enough broth to fully cover all the poultry. The old instructions that told us not to add water when raw packing was for fear the meat would overproduce liquid, which would then cause grease to get onto the jar rim and prevent the lid from sealing.
- As long as you maintain a 1¼-inch headspace and wipe each jar rim with distilled white vinegar, you have sufficiently eliminated the possibility of the lid not sealing due to grease/fat getting onto the jar rim. While it is still acceptable to skip the added water when raw packing, it truly is a personal preference.
READ MORE: CHICKEN FAJITAS CANNING RECIPE AND SPICE BLEND
- The decision to add water, or not, has to do with the poultry’s intended use. I personally prefer to add water to some jars because I want the ability to use the broth it creates. Plus, when I add water during raw packing, I can be sure the meat is fully covered with enough liquid to prevent oxidization which discolors and dries out the uncovered meat. There are times, however, I will simply toss a large breast in a jar without any water, because I know I will shred it later; had there been broth in the jar, I would have simply drained it prior to use.
Canning Chicken and Poultry Instructions and Processing Chart
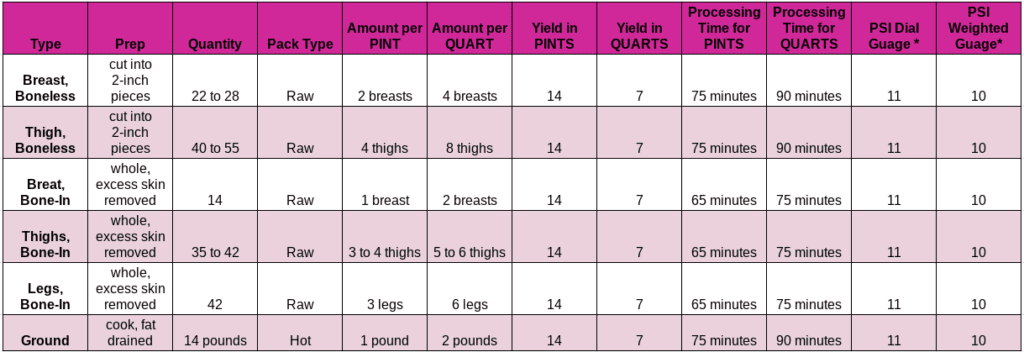
*The PSI listed is for standard elevation. Elevation above 1,000 feet require more PSI. Use the Altitude Chart to guide you.
- Using the chart above, prepare and pack the chicken/poultry into jars, leaving a generous 1 inch of headspace.
- If using water, cover the meat with water slowly, and use your air bubble remover tool to move the meat around as you pour. This will remove air pockets as your fill your jar. Remove any trapped air bubbles and add additional water if necessary to maintain the generous inch of headspace. Do NOT cover with water when canning ground poultry.
- Wipe the rim of each jar with a warm washcloth dipped in distilled white vinegar. Place a lid and ring on each jar and hand tighten.
- Place jars in the pressure canner, lock the pressure canner lid, and bring to a boil on high heat. Let the canner vent for 10 minutes. Close the vent and continue heating to achieve 11 PSI for a dial gauge and 10 PSI for a weighted gauge. Process quart jars for 90 minutes and pint jars for 75 minutes.
- Once processing is completed, turn off the heat and allow the pressure to naturally dropped to zero, which could take upwards of 30 minutes. Remove the canner lid and allow the jars to sit for 10 minutes undisturbed. Remove jars and place them on a cutting board to cool.
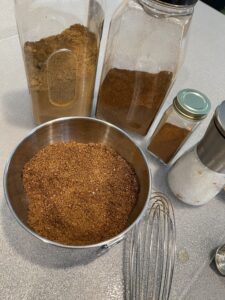
Seasoning Chicken or Poultry When Canning
There are many options you may explore when home canning chicken. What it comes down to (again) is how you intend on using the chicken in meals. In many cases, I tell people to use the common herbs and spices you cook with regularly. If your staple seasonings are minced garlic, salt and pepper – add it to each jar. If you know you plan on making tacos or enchiladas with your home canned chicken, then add your favorite taco seasoning to each jar.
Click here for several homemade chicken spice blends to help give your home canned chicken the flavors it deserves.
Happy Canning!
xo
Diane, The Canning Diva®
www.canningdiva.com